Blog Archive

Nuestros Post

En Soluciones Rubarb Te mantenemos al tanto de las novedades tecnológicas día a día.

A continuación enumeramos algunas de nuestras fuentes:

Softonic

Bitelia

Mi Blackberry

Blackberry Latino

Centro Blackberry

La Blackberry

Techtastico

Con la tecnología de Blogger.
viernes, 17 de agosto de 2012

Cómo configurar el correo web de Outlook en Android y iOS

Hace unas semanas Microsoft sorprendía a propios y extraños en lo que no sólo era un cambio de nombre, sino algo más. El mítico Hotmail, el servicio de webmail que popularizó el correo web, cambiaba y se convertía en Outlook bajo su propio dominio, nombre compartido con el famoso gestor de correo de escritorio de los de Redmond.

Iniciar sesión outlook

Desde entonces se han registrado millones de nuevas cuentas y parece que Microsoft vuelve a tener el favor de usuarios que habían abandonado poco a poco el servicio en favor de otros como Gmail. Y es que aunque aún esté lejos de alcanzar a este en cuanto a funcionalidades, el servicio promete, y por ello no es raro que muchos quieran adoptarlo como su nuevo correo personal y utilizarlo también a través de sus dispositivos móviles.

A falta de una aplicación en Android o iOS, algo que seguramente veremos, o deberíamos ver en poco tiempo, ya podemos configurar el correo en ambos sistemas y en cualquier cliente que soporte el protocolo POP3. Los pasos a seguir son los siguientes, y bastará con que accedáis al cliente nativo de iOS o Android, o a cualquiera de las alternativas disponibles en las tiendas de aplicaciones siempre y cuando soporten citado protocolo:

1.- Escribir la dirección de correo completa. Por ejemplo, direccion@outlook.com.
2.- Seleccionar configuración manual o POP3.
3.- Cambiar el puerto por 995 y el servidor POP3 por pop3.live.com (por defecto debería aparecer pop3.outlook.com).
4.- Permitir todos los certificados SSL/TSL.
5.- Configurar el servidor SMTP con los siguientes datos: smtp.live.com, puerto 587, sin credenciales.

Por último configuramos las propiedades de nuestro cliente, tales como intervalos de sincronización, recordar autenticación, etc. Ya podemos utilizar Outlook.com en nuestros dispositivos móviles.

Fuente www.bitelia.com

martes, 14 de agosto de 2012

Guía de Windows 8 (4): Controles, gestos y atajos de teclado

Guia de Windows 8 Episodio 4

Windows 8 ha cambiado varias cosas que dábamos por sentadas en este sistema operativo: la pantalla de Inicio, el Menú Inicio y cómo moverte por el sistema.

En este episodio te explicamos cómo moverte con gestos táctiles (si lo usas en una tablet), así como gestos de ratón y atajos de teclado (si lo usas en un PC). No te sientas como un pez fuera del agua y sigue leyendo.

Gestos táctiles (en una tablet)

El uso de Windows 8 en una tablet es tan fácil como manejarte por cualquier smartphone. Todo se reduce a toques, arrastrar, deslizar y controlar con dos dedos.

Gestos

Te explicamos cómo moverte por Windows en tu pantalla táctil en el siguiente vídeo:

lunes, 13 de agosto de 2012

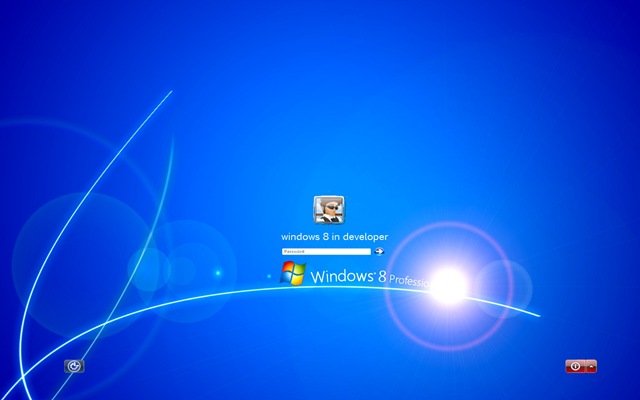
How To Make Your Windows 7 Login Screen As Like Windows 8

If you are You are using Windows 8 Consumer Preview then you must love the login screen. It looks Great and have a cool look. But for those people who are still using Windows 7 and want to get Windows 8 Login Screen on their Windows 7 PC then I have a nice trick for them. In this post, we will tell you how you can make your Windows 7 Login Screen as like Windows 8.


So how to get Windows 8 Login screen on Windows 7 PC ? Here is the step by step tutorial just follow the steps.

Step 1: Download this RAR file from here

Step 2: Now, Go to your “C:\Windows\System32″ Folder and and take ownership of authui.dll file. To know about how to take ownership on a file click here.

Step 3: Now, Rename the file as authui_win7.dll

Step 4: Now, do the same thing for file basebrd.dll. Rename it from basebrd.dll to basebrd_win7.dll which is located in “C:\Windows\Branding\Basebrd” folder.

Step 5: Now, UnRar the file you have downloaded in Step 1, you will get two file namely:
authui.dll
basebrd.dll

Step 6: Copy and paste the download authui.dll file to “C:\Windows\System32″ Folder.

Step 7: Do the same with the downloaded basebrd.dll file, copy and paste it to “C:\Windows\Branding\Basebrd” folder.

Step 8: Restart your PC to see the change.

Note:
*If you want to roll back Windows 7 Login screen then just rename the new file on that folder as authui.dll to authui_win8.dll and authui_win7.dll to authui.dll.
*You need to take ownership to rename the file as like previous.

About Author : This guest post is written by Tanmoy Das, a blogger, hacker and gamer. He writes articles on his own blog Cyber Key about tech news and Tips N Tricks.

Source http://www.techieapps.com

Facebook will Disclose its New Photo Sharing Feature Soon

Are you still facing some problem in sharing photographs with your friends on Facebook? Well, social media giant – Facebook is going to allow you real-time sharing of photographs among your friends in the form of a postcard.

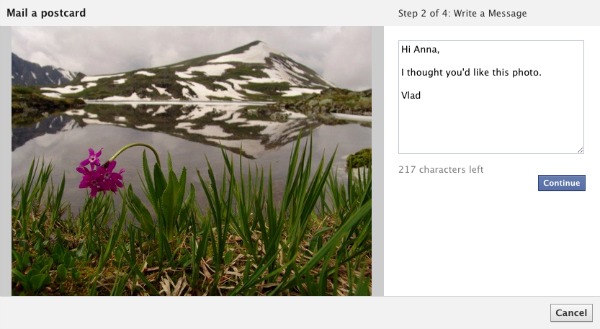
You might be wondering how it will work? Let us tell you that you would get to see a “Mail a postcard” buton at the bottom of the photos you are viewing. Just click on the button, a screen will open up and there you would need to enter the email address of the recipient. You would also get an option to enter a personal message for the person, this would be included in the photo. Some of the testers said that this feature works on private photos only, they are not able to send public photos to their friends. Though testing is still going on its functionality, you might get the full-fledged feature to email the desired photo to your friends. As per the reports, this latest feature is powered by Sincerely, the makers of Postagram. This feature can be used in the phone as well, the app would cost you somewhere around $.99.

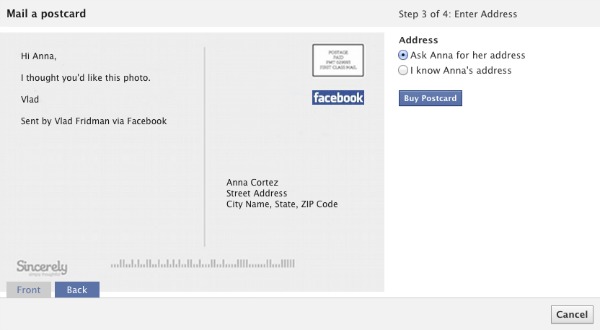
This feature would work as the traditional postcard, photo on the front side of the card and backside would include the personalized message and the address. You can type your friend’s address if you know it, else you can ask him/her for the physical address, as shown in the picture.

A Facebook representative revealed that they are trying to figure out several pricing points before finalizing on the cost of the application. Do you think that the idea of physical photo sharing would work wonders to the Facebook users?? Share your ideas and thoughts through the comments section below.


Source http://www.techieapps.com

Cómo transferir fotos entre iPhone y la PC vía Wi-Fi

Si tienes un dispositivo con iOS, debes saber muy bien que para transferir cualquier cosa necesitas usar iTunes. Este programa siempre me ha parecido pesado y torpe, y a pesar de que ha mejorado con el paso del tiempo, sigue siendo así. Por otro lado, si eres usuario de Linux no puedes instalar esta aplicación, tienes que usar algunas de terceros, o evitarlo por completo.

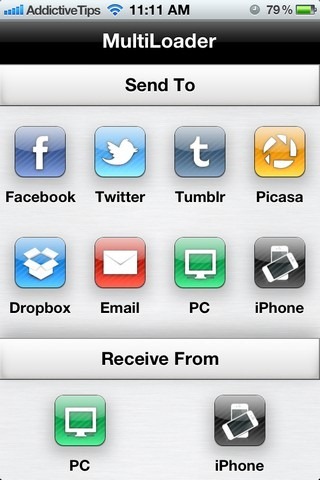
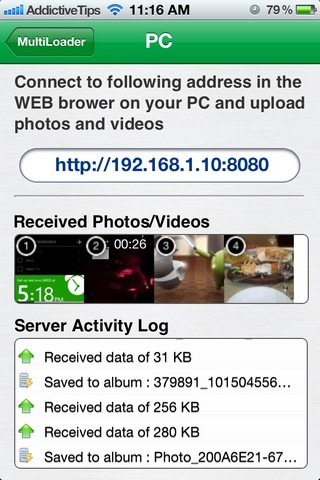
Para solucionar esto podemos usar MultiLoader, una aplicación gratis para iPhone que te permite conectarte entre el teléfono de Apple y una computadora, y mandar todas las imágenes que quieras de uno al otro, solo conectándose a través de una misma red Wi-Fi.

Su uso es extremadamente simple. Comienza por instalar la aplicación desde la App Store. Al abrirla conseguir la sección “Receive From” y presiona “PC”.

Se te entregará un enlace que deberás abrir en tu navegador preferido y desde ahí tendrás un botón para examinar y subir las imágenes. Solo se conectará cumpliendo la condición de que ambos estén en el mismo Wi-Fi. La interfaz del navegador solo te permitirá subir una imagen a la vez pero se puede subir un ZIP para que sea más rápido. Luego puedes descomprimir en el iPhone.

Si presionas “Receive From iPhone” el proceso será al revés, del iPhone a la PC. Adicionalmente la aplicación también tiene la opción “Send To” donde también podrás enviar las fotografías a Facebook, Twitter, Tumblr, Picasa, Dropbox, correo electrónico y más. Así que tendremos para compartir en redes sociales, algo que es casi indispensable en cualquier aplicación nueva.

Instala MultiLoader [Vía]

Blog Archive